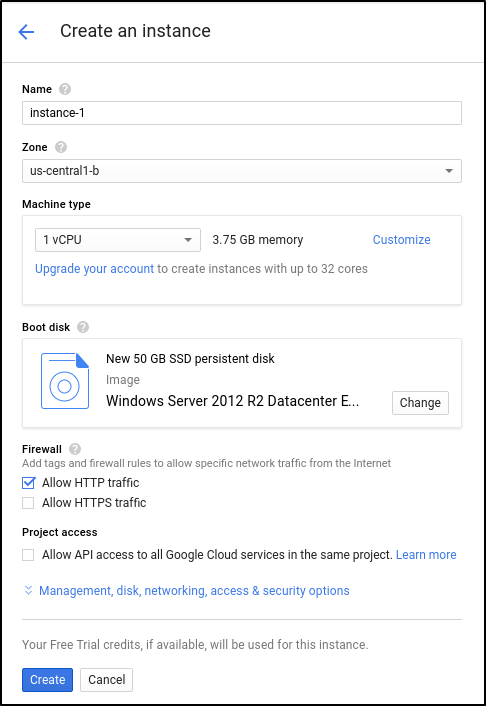
To create a Windows virtual machine instance in Compute Engine using the Google Cloud Platform Console, ensure these are done in the first place:
-
Select or create a GCP project.
-
Make sure that billing is enabled for your Google Cloud Platform project.
-
If you aren't using Windows on your local machine, install a third-party RDP client such as Chrome RDP by FusionLabs.
Create a virtual machine instance:
-
In the GCP Console, go to the VM Instances page.
-
Click Create instance.
-
In the Boot disk section, click Change to begin configuring your boot disk.
-
On the OS images tab, choose Windows Server 2012 R2 Datacenter.
-
Click Select.
-
In the Firewall section, select Allow HTTP traffic.
-
Click Create to create the instance.

Allow a short time for the instance to start up. Once ready, it will be listed on the VM Instances page with a green status icon.
Connect to your instance:
-
Go to the VM Instances page in the Google Cloud Platform Console.
-
Under the Name column, click the name of your virtual machine instance.
-
Under the Remote Access section, click the Set Windows Password button.
-
Specify a username, then click Set to generate a new password for this Windows instance. Save the username and password so you can log into the instance.
-
Connect to your instance using your choice of graphical or command-line tools.
 REGISTER FOR FREE WEBINAR
X
 Thank you for registering
Join Edureka Meetup community for 100+ Free Webinars each month
JOIN MEETUP GROUP